


Set rngAll = Range("A1:G12")
With rngAll.Borders
.LineStyle = 1
.ColorIndex = 1
.Weight = xlThin '// xlThin : 가는 실선, xlThick : 굵은 실선
End With
rngAll.BorderAround LineStyle:=xlContinuous, Weight:=xlThin, ColorIndex:=1
1. 일단 첫번째 줄의 Range("")는 A1~G12까지의 영역을 잡는 것을 의미합니다.
(* A1에 클릭하고 G12까지 드래그한 거랑 같은 의미이죠)
2. With에서 부터 설명 드리자면
- .Borders는 구간범위의 선(Borders) 그리기위한 부분입니다.
- .LineStyle = 1은 실선을 그리라는 이야기입니다.
- .ColorIndex = 1은 검은색이라는 거구요.
* 더 자세한 정보는 구글에서 Excel ColorIndex로 검색해주세요.^^
- .Weight = xlThin는 가는실선이라는 뜻입니다.
rngAll.BorderAround LineStyle:=xlContinuous, Weight:=xlThin, ColorIndex:=1
위의 부분이 적용시키는 거구요.
* 옵션 정보
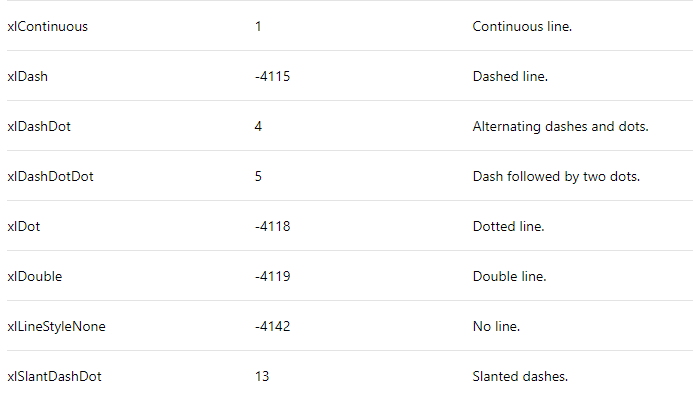
LineStyle정보(https://docs.microsoft.com/ko-kr/dotnet/api/microsoft.office.interop.excel.xllinestyle?view=excel-pia)

Weight정보(https://docs.microsoft.com/ko-kr/dotnet/api/microsoft.office.interop.excel.xlborderweight?view=excel-pia#Microsoft_Office_Interop_Excel_XlBorderWeight_xlThin)

우주의빛
자료를 공유하고 좋은자료 추천 하는 곳입니다.
